Section 6: Polishing method
In electrochemical measurements, the purpose of electrode polishing is to remove redox reaction products that have accumulated while using the electrodes. The reaction rate (corresponding to the attenuation of the response) that coats the electrode depends on the following factors:
- Electrolyte molecules
- Electrolyte solution concentration
- Electrolyte solution
- Applied voltage
- Frequency of use
The polishing process is to scrape the electrode surface to create a new electrode surface. The following precautions should be taken when handling and polishing working electrodes.
- Polish the electrodes on a hard and flat surface. When polishing, the electrode (especially the working electrode) should be as parallel to the polishing surface as possible. This will result in a flat peak surface.
- Do not remove the electrode material from the electrode. Be careful not to damage the contact surface between the electrode and the main body or the surface of the electrode.
- Do not heat the electrodes above room temperature.
- Use only ALS abrasives. If you use another company's abrasive, we cannot guarantee it.
6-1 PK-3 Electrode Polishing kit
The PK-3 Electrode Polishing kit is packaged for polishing precious metal and glassy carbon electrodes used in electrochemical measurements. For example, when using a gold electrode as a mercury amalgam electrode.
The final performance of the thin-layer mercury cell depends on the finish of the electrodes. Electrodes with a mirror-like finish are very good electrodes.
6-2 PFCE electrode polishing
The PFCE graphite carbon electrode used for electrochemical measurement is easier to polish than the glassy carbon electrode, anyone can easily obtain excellent electrode sensitivity and reproducibility by performing a certain polishing method, when electrode properties deteriorate or the electrode surface becomes dirty.
| Catalogue No. | Description | Quantity | purpose |
| 012611 | Emery paper UF800 (20 pcs) | 1 | For PG and PFCE electrodes |
6-3 Polishing of glassy carbon electrodes
There are three steps to polishing the working electrode used for electrochemical measurements, but it is not always necessary to perform all three steps. Select the appropriate abrasive depending on the condition of the electrode surface.
Step 1: Remove large depressions in the glassy carbon surface (using emery paper and distilled water).
Step 2: Roughly polish the electrode surface (using polishing diamond and diamond polishing pad).
Step 3: Finish (using polishing alumina and alumina polishing pad).
For effective polishing, each pad and electrode surface should be rinsed with water at each stage. Running water should be used to rinse the abrasives from the electrode surfaces and to avoid mixing the different abrasives. In particular, before moving to the final (third) step of alumina polishing, be sure to clean the electrode surface because the particle size is different (see Fig. 6-1).

Fig. 6-1 Polishing of glassy carbon electrodes.
- Prepare the glass plate, and put a few drops of polishing diamond on a wetted diamond polishing pad.
- Hold the CV electrode at right angle to the pad, and polish in a circular motion.
- Replace the diamond pad to an alumina polishing pad, put a few drops of polishing alumina, and polish the electrode to be mirror surface. Rinse the electrode surface with distilled water, and finish by air drying.
- Using a new alumina polishing pad, polish few times the electrode (for removing the alumina particles remaining on the electrode surface). Rinse the electrode surface with distilled water, and finish by air drying.
1) Rough polishing
This polishing is performed by dripping water on the rough polishing pad (see Fig. 6-1-1). Moisten the surface of the rough polishing pad thoroughly with water, place the electrode surface on the pad, and polish by applying light force in a figure of 8 motion (see Fig. 6-1-3). Do not apply strong force, as this will cause big scratches on the electrode surface. To maximize the use of the polishing pad, make a circular motion over the entire pad. After about 30 seconds to 2 minutes of polishing, the large dents on the surface disappear.
If polishing for a long time, add water or replace the pad. Thoroughly wash away any dirt from the electrodes before moving on to the next step.
2) Intermediate polishing
This polishing process uses polishing diamond and a diamond polishing pad (see Fig. 6-1-2.). After shaking the polishing diamond well, apply about 8 to 10 drops on the pad to start polishing. After polishing for about 2 minutes, the surface will shine. Before the next finishing step, thoroughly wash off the polishing diamond and wipe the electrode surface with acetone to remove the abrasive.
3) Finish polishing
In this final finish polishing step, scratches on the electrode surface are removed. Drop about 10 drops of water on the alumina polishing pad (to the extent that the pad gets wet), put a few drops of polishing alumina on it, and start polishing (see Fig. 6-2-2 and 3). After 3 to 4 minutes, rinse the abrasive thoroughly with distilled water and wipe the surface with a soft paper.
6-4 About amalgam electrodes
It is specially designed to facilitate oxidation and reduction reactions on mercury electrodes.
This type of electrode is characterized by the presence of an auxiliary electrode directly above the working electrode in the thin-layer cell. The advantage of using mercury as the electrode material is the ability to apply a deep negative potential.
In this electrode, mercury drops are dropped onto the gold electrode surface to form a thin layer of mercury. Instead of HMDE and DME, which are adversely affected by vibration and system instability, the thin-layer process eliminates such concerns. In this system, dissolved oxygen must be completely removed from the mobile phase because dissolved oxygen is easily reduced on the mercury surface.
1) Gold/mercury electrode storage
When this electrode is used for the first time or has not been used for a long period of time, a new mercury film must be created on the gold electrode surface. To do so, first remove and clean the old amalgam, then re-polish the gold electrode surface and form a new amalgam on that surface.
2) Removal of old amalgam
1. When 6N nitric acid is dropped on the electrode surface, the amalgam dissolves and the color of the solution changes from gray-black to yellow.
2. If this reaction does not occur within 2 minutes, replace the nitric acid solution.
3. Scrape the electrode surface with the tip of a glass pipette while dropping the nitric acid solution.
4. After the color changes, rinse with distilled water and move on to the next step (see Fig. 6-2).

Fig. 6-2 Removal of mercury amalgam.
3) Regeneration of gold electrode surface
The final quality of the thin-layer mercury electrode will affect the quality of the gold surface. In general, the smoother and more mirror-like the electrode, the better the electrode. Mirror finish is difficult with manual polishing, but it can be easily finished by the following procedure.
This procedure consists of three steps, but it is not necessary to perform all of them. For example, it may be possible to prepare a new mercury film without polishing.
Step 1: Eliminate large dents in the gold surface in order to quickly remove decomposed mercury and form a uniform amalgam.
Step 2: Rough polishing.
Step 3: Finish in good condition for amalgam formation.
All of these steps can be performed with the items in the polishing kit. In order to maximize the polishing results and to extend the life of each pad, each step should be followed by a rinse with water. Running water should be used to rinse the abrasive from the electrode surfaces, to avoid mixing of the different abrasives.
Be sure to clean the particles, especially before moving on to the final stage, alumina polishing, because of the different particle sizes. After the old mercury amalgam has been acid-treated to a faded yellow gold surface, the next polishing is performed to attach the new amalgam.
4) Rough polishing
1. Moisten the surface thoroughly with water.
2. Press the electrode surface on it, move it in a circular motion, and apply light force.
(Do not apply a large force. It will cause a big scratch on the gold surface.)
3. To make the best use of the polishing pad, draw a circle throughout the pad.
4. After polishing for about 30 seconds to 2 minutes, the surface will turn golden.
5. When polishing for a long time, add water or replace the pad.
6. Thoroughly wash off dirt from the electrodes before moving to the next step.

Fig. 6-3 Rough polishing of the electrode surface.
5) Intermediate polishing
1. Shake the diamond abrasive well.
2. Drop about 8 to 10 drops on the pad and start polishing until the surface of the gold starts to shine.
3. Thoroughly rinse off the abrasive before moving on to the next finishing step.

Fig. 6-4 Diamond polishing of electrode.
6) Finish polishing
In this final step, the gold surface is finished to a mirror-like finish.
- Add 10 to 20 drops of water on the alumina polishing pad (brown felt pad) (enough to moisten the pad) and add 5 to 6 drops of polishing alumina on the pad to start polishing (see Fig. 6-4).
- After 3 to 4 minutes, rinse the abrasive thoroughly with distilled water.
- The surface is in good condition to make mercury amalgam electrodes.
- If you wipe the surface with soft paper, the surface of the gold electrode will shine.
- Small scratches on the surface do not significantly affect the performance of the cell, but if the scratches are large, the cell should be re-polished again.
7) Preparation of mercury amalgam
This is easy and quick and does not require any special skills. Mercury is volatile, so store it in the designated airtight container. A mercury film on a gold surface is created by placing a small amount of mercury on a polished gold surface (see Fig. 6-5). The gold surface should be completely covered with mercury.
After 2 to 3 minutes, scrape off the excess mercury.
After removing the mercury, wipe the surface with a soft, dry tissue until it shines like a mirror.

Fig. 6-5 Method of making mercury amalgam electrode.
If excess mercury is left on the surface, it can short-circuit the counter electrode and cause noise. In such cases, add one more gasket (TG-8M). It is not necessary to always remove the old mercury with each new mercury film.
The new mercury amalgam can be layered on the old mercury. After cleaning the surface with water and methanol, apply a small amount of mercury to the surface of the old amalgam.
Excess mercury is removed as described above. After wiping off the mercury with a dry tissue, the electrode is ready for use. The surface is rougher than when they were re-polished, but both are equally shiny.
Usually, after amalgamization, it takes time to stabilize. Let stand for at least 6 hours to form a mercury amalgam electrode. If the amalgam electrode is used without leaving it for 6 hours, a very high background will be generated and the electrode response will change, so this stabilization must be performed. Also, be sure to check the sensitivity before measuring the sample.
When using an amalgam electrode to measure thiol substances such as glutathione, the dissolved oxygen in the mobile phase is a source of noise, so highly sensitive analysis is not possible unless the dissolved oxygen in the mobile phase is removed by gas purging such as helium, or the oxygen is removed online by continuous degassing with the degasser.
6-5 Preparation of carbon paste electrode
This section describes how to prepare carbon paste electrode for electrochemical measurements.
The feature of this electrode is that a new electrode is prepared each time the carbon paste is filled and polished.
During the preparation, please wear a lab coat, as carbon paste will stain your clothes.
Carbon paste can be easily used to study compounds that dissolve in aqueous systems, for example, mixing chemicals and carbon paste to create chemically modified electrodes, or mixing enzymes and carbon paste to create enzyme electrode.
Carbon paste is soluble in organic solvents.
When not in use, the carbon paste should be stored in a tightly closed vial as it is prone to contamination.
Preparation method of carbon paste electrode
The following figure shows a working electrode for a flow cell, but the preparation method is the same for a CV working electrode.
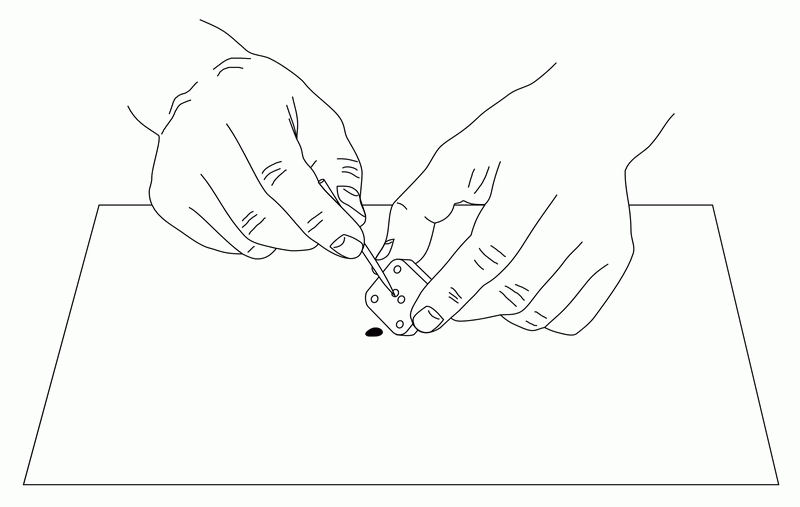
Fig. 6-6 Remove old carbon paste from the electrode holes with a pointed instrument (such as a toothpick).
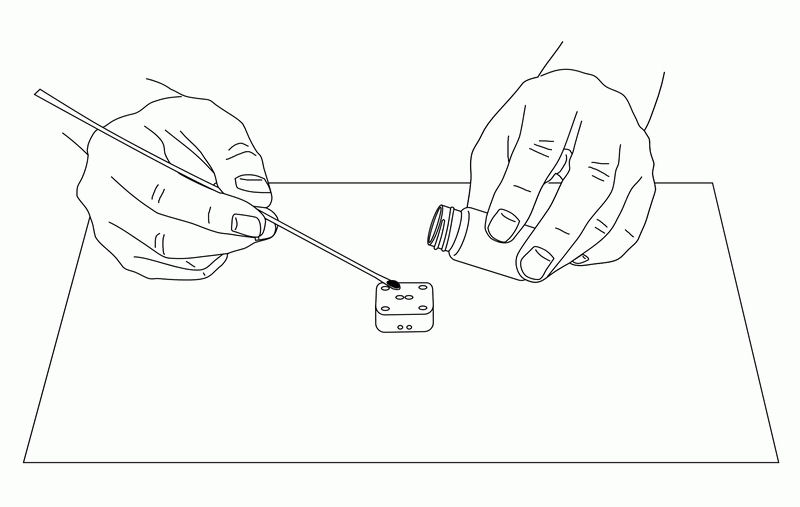
Fig. 6-7 Pile up carbon paste in the holes of the electrode with a spatula.
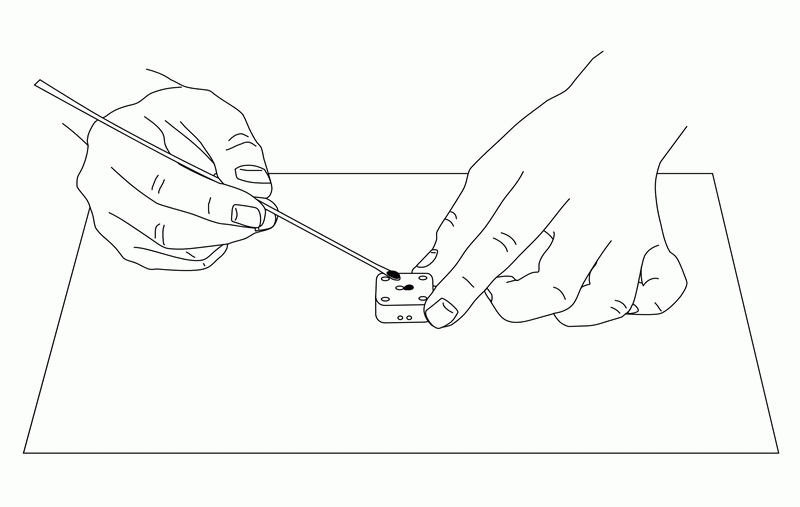
Fig. 6-8 Fill the holes of the electrodes with carbon paste.
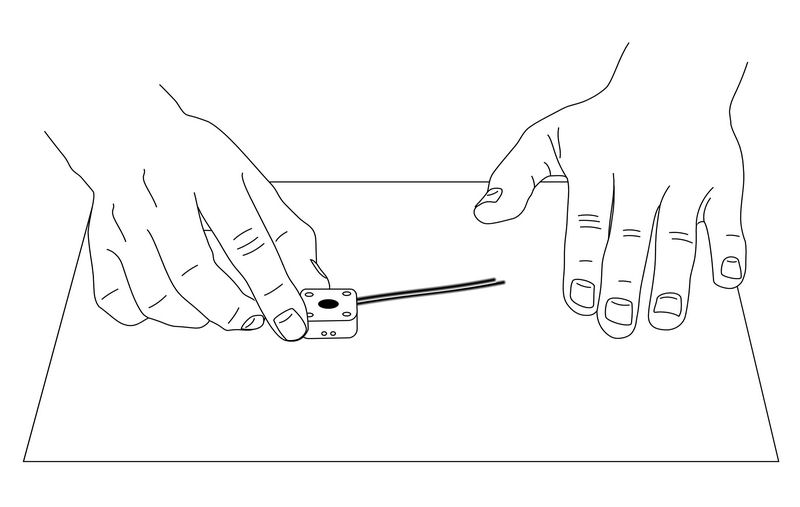
Fig. 6-9 Remove excess carbon paste on flat paper.
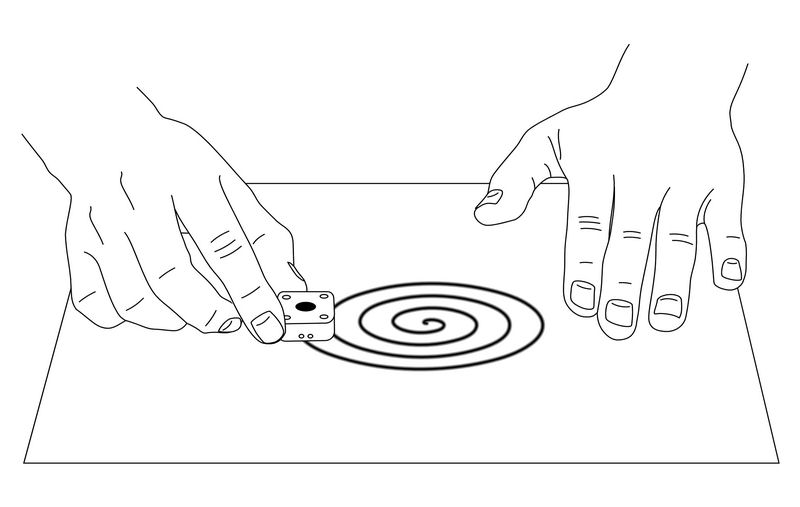
Fig. 6-10 Polish the carbon paste electrode surface on a flat piece of paper.