3. Instrument setup
Instrument setting:
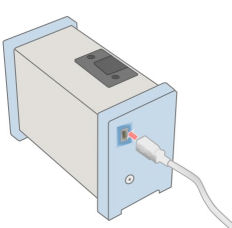
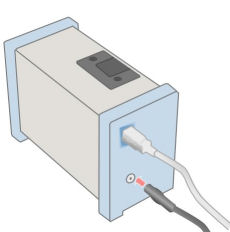
1. At the first stage, a cable is connected to Handy SPR port. Next, power supply
adaptor is connected to Handy SPR.
 |
 |
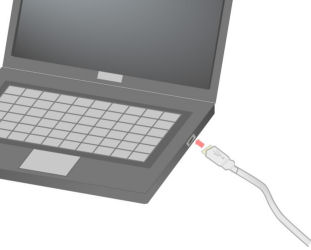
2. The other side of the cable is connected to the port of PC, and the plug of
a power cable is connected to a wall socket.
 |
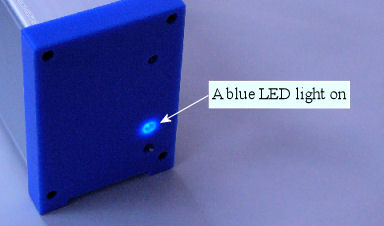
3. Then the power switch of Handy-SPR is turned 'ON'. Blue LED lights up.
 |
Program installation
A program CD includes with Handy SPR evaluation Kit that is easy to install into PC with Windows 98, 2000 and XP. Excel program is required to analyze SPR data. This program CD contains both application and analysis software.
The procedure of CD installation into PC is shown in as follows. However, depending on PC configurations, the procedure may differ from PC to PC.
1.Insert Program CD into CD driver of PC
2.Open CD on PC and click on “setup.exe” to perform the installation
3.Follow the direction of installation program
4.A folder called "SPR win3" (SPR application software) will appear on Windows menu
5.Installation is completed
In this consequence, the minimum requirements of PC's configuration for Handy SPR application that we usually recommend are as follows-
- CPU- Pentium or Celeron with 750 MHz or more
- HDD-20 MB or more
- Memory-256 MB or more
- OS-Windows XP
Operating Procedure of SPR program:
1. At the beginning, connect the PC cable between SPR instrument and PC. Simultaneously, connect power supply cable and turn on the power, a blue light appears. Then, double click on "SPR win3" software. As a result, the following windows will appear.
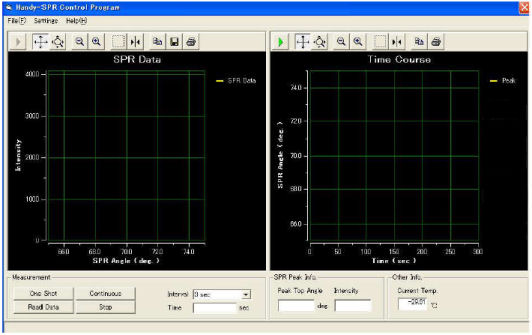 |
Point to be noted: Be sure that the light of power supply is on before opening the software program. Without power supply on, software program will not open.
Program Settings:
In the window called “ Handy-SPR Control Program”, click on the settings caption at the menu bar and go through “Operate Settings” caption. After words, a new window will open.
There are three setting items that will appear on the Operate setting windows like-
(i) Linear CCD Settings,
(ii) SPR Peak Detect and
(iii) SPR Angle Calibration.
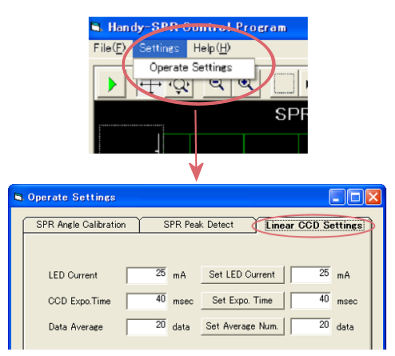 |
At the same time, light source for SPR measurement is arranged via Linear CCD Settings window. The current value of LED, CCD Exposure time and the number of data should be arranged here.
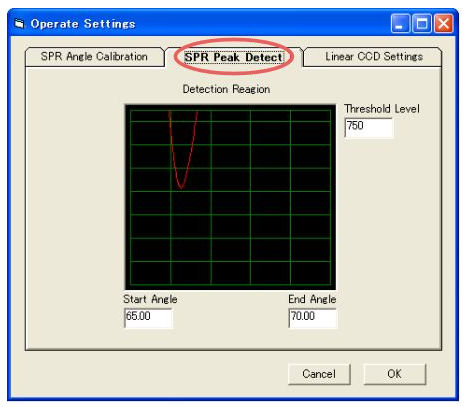
Then, click on SPR Peak Detect icon on Operate Settings bar. A new window will appear that is shown in below. Now, select a suitable threshold level and angle ranges to observe a good SPR curve.
 |
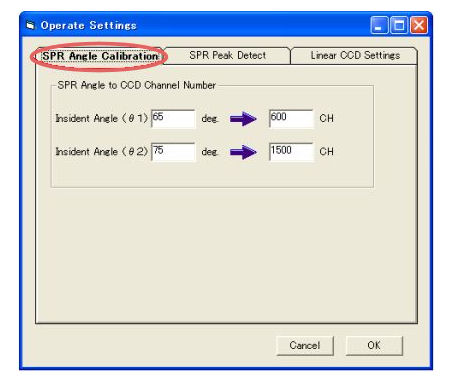
Again click on SPR Angle Calibration and a new window will open. It is possible to set the SPR angle and pixel number on linear CCD to incident angle.
 |
Finally, click on OK to activate the Operate Settings bar.
Measurement settings:
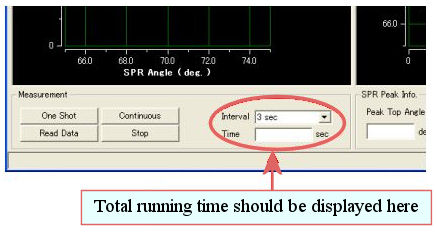
Measurement interval should be checked before measurement process starts for data saving at a specific interval. A measurement interval can be changed at 3, 5, 15 seconds etc.
 |
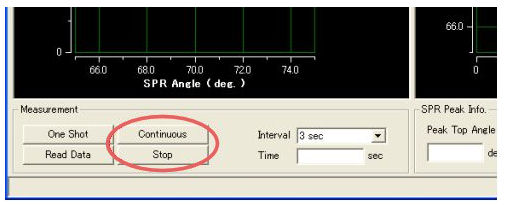
The button is clicked continuously for starting the measurement. To terminate the measurement, 'Stop' button should be clicked.
 |
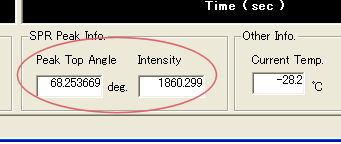
During the measurement, the SPR curve with angle changes (deg) against intensity is displayed on left side graph for every measurement. In a real time measurement, the changes of SPR angle and intensity with the moving time are displayed on the bottom of right- side (red circle).
 |
| Catalog No. | Description |
| 012072 | Handy SPR PS-0109 |
| Components | |
| Transmission cable | |
| Power cable | |
| Software | |
| 011870 | Matching oil |
| 011869 | Gold chip |
| 011871 | PDMS flow cell |
![]()

